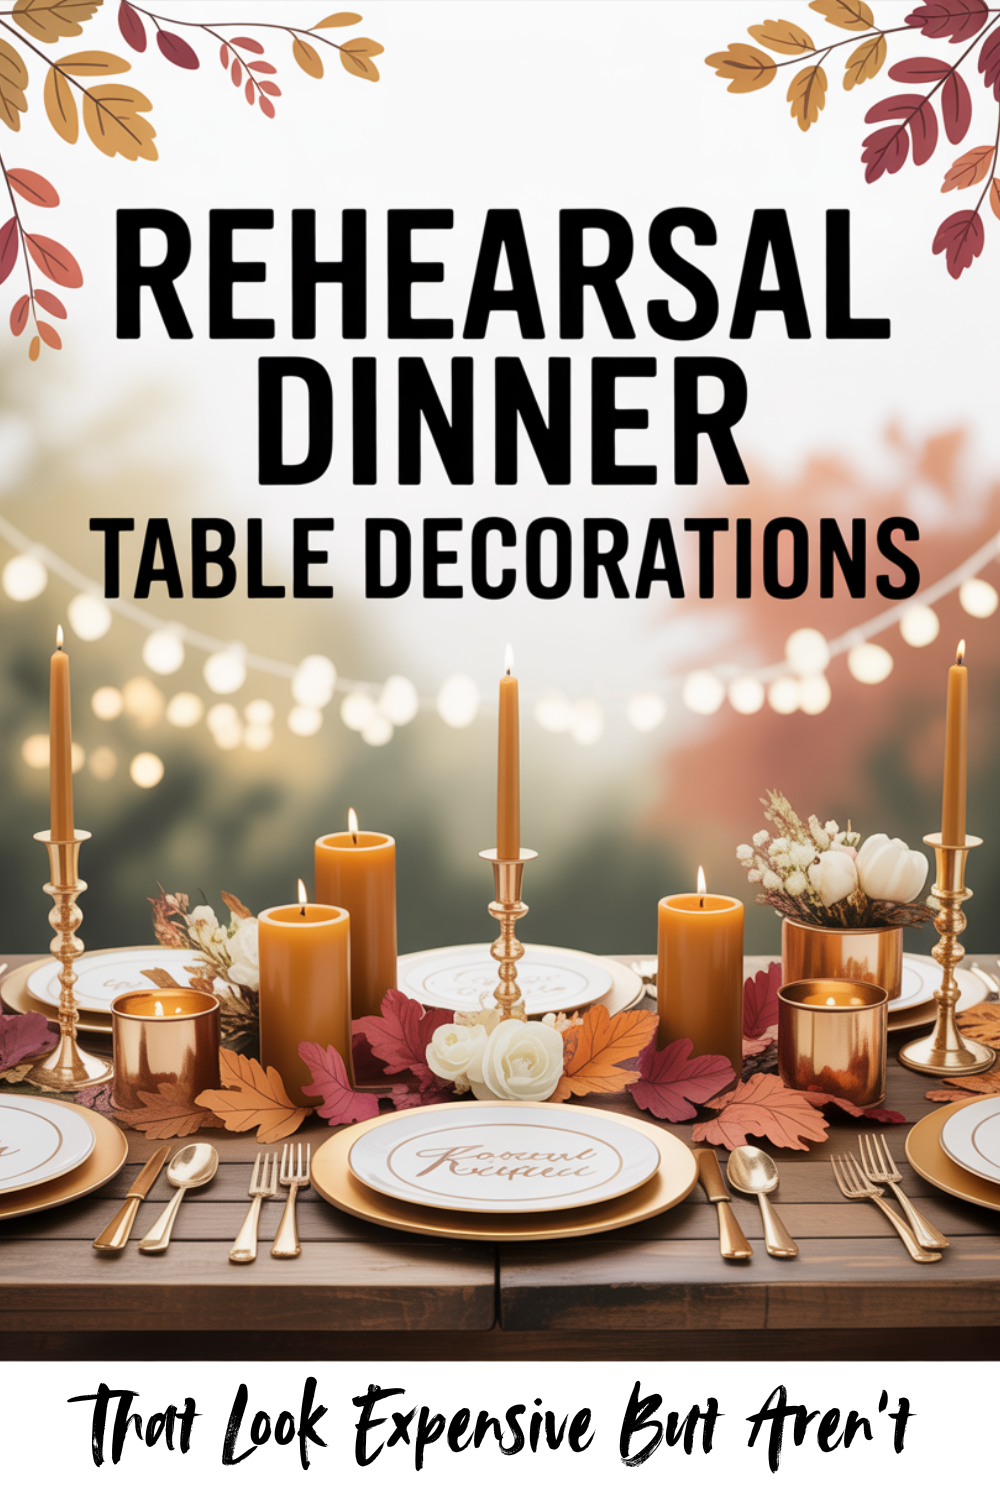
The good news is you don’t need a florist, a fog machine, or a Pinterest board with 847 pins to make it happen. You need the right combination of candlelight, flowers, and a few well-placed paper goods—and you need them to actually survive the night intact, whether that’s in a restaurant private room, your parents’ backyard, or a rented event space.

The best part? The table is where the magic happens regardless of venue. Decorating the tables rather than the whole space gives you maximum visual impact with minimum effort and budget. Every tip here works across settings, with notes on where the logistics differ so you’re not caught off guard at 6:45 p.m. with the appetizers about to arrive.
Whether you’re keeping it minimal with just votives and place cards or going lush with a greenery runner and custom paper goods, these ideas will help you build a rehearsal dinner table that feels hosted without doubling as a part-time job. Browse our Real Weddings directory for even more styling inspiration.
1. Master the Art of the “Glow Up” (Without the Fire Hazard)

Ever wonder why some tables look like high-end editorials while others feel like a standard Tuesday night? The secret isn’t usually more expensive flowers. It’s the glow. Candlelight is your ultimate shortcut to instant ambiance, softening the room and making everyone’s skin look flawless in photos.
The catch? Fire marshals, venue managers, and HOA rules aren’t always fans of open flames near your aunt’s polyester wrap. To nail your rehearsal dinner table decorations without a fire drill, use this simple math for your candle order:
- 8-foot banquet table: Use 5 to 7 votives for a minimal look or 8 to 12 for a heavy, romantic glow.
- 60-inch round table: Aim for 6 to 8 votives spaced evenly around your centerpieces.
Avoid lining them up in a stiff, military-style row. Instead, cluster them in two or three “islands” of varying heights. This creates visual depth and that effortless look that actually takes a bit of strategy.
If your venue has a strict no-flame policy, don’t panic. Swap real wax for warm-white LED votives. To avoid “operating room” vibes, choose LEDs with a frosted shell and a flickering amber tone. Finally, keep the decor low. Your guests should be making eye contact across the table, not dodging a candle obstacle course just to pass the breadsticks.
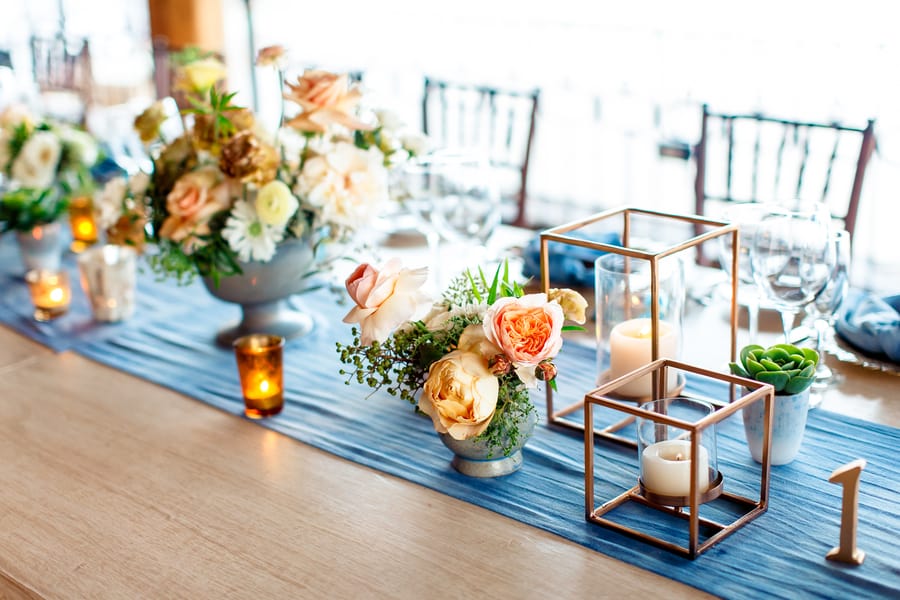
2. Ditch the Centerpiece for the Bud Vase Brigade

Have you ever tried driving with a three-foot floral arrangement buckled into your passenger seat? It’s a recipe for soaked upholstery and a stressed-out bride. Massive centerpieces are great for weddings, but they often block the view and stifle conversation. Why pay florist prices when you can DIY a look that’s relaxed yet abundant?
Enter the bud vase. This works perfectly for narrow restaurant tables where space is limited. The math is simple: plan for three to five stems per vase and place one every 18 to 24 inches down the table. This ensures your rehearsal dinner table decorations look lush without cluttering the guest space.
You don’t need a green thumb to pull this off. Grab two mixed bouquets from Trader Joe’s or Costco and break them apart. Mix two or three different vase shapes to keep the eye moving, but keep heights low so guests can actually see each other. Between every two vases, tuck in a small cluster of tea lights.
How do you transport them safely? Use a cardboard wine box with dividers to keep everything upright. If you’re short on boxes, nestle the vases between rolled-up towels in a plastic bin. You should spend your evening sipping wine, not playing glass-jenga on the highway.
3. Make Your Table Decor Do the Social Heavy Lifting

Why spend a fortune on peonies when the real obstacle is the awkward silence between your college roommate and your future mother-in-law? Pinterest obsesses over the “aesthetic,” but we know the truth. Your tables should do some serious social work.
Most guests are meeting for the first time. Since staring at a floral arrangement won’t help them find common ground, use your rehearsal dinner table decorations to spark a conversation. Try these interactive options:
- “How well do you know the couple?” mini cards at each setting.
- Family trivia prompts tucked under the bread plate to break the ice between families.
- Small QR code tent cards that say, “Drop your pics here” so you can see the night through your guests’ eyes.
This gives everyone a task and a reason to interact without those painful small talk spirals. Keep these elements small, legible, and visually consistent with your menus. They should feel like part of the design, not a tedious homework assignment.
For maximum engagement, place one at every setting. If you’re rushing or on a budget, two or three per table still does the trick. Just remember to keep it classy. This is an intimate dinner, not a game show. One interactive element is plenty to get the ball rolling without making your guests feel like they’re trapped in a corporate icebreaker.
4. Master the Long Table with Modular Greenery

Have you ever tried to wrestle a twenty-foot greenery garland into a compact car? It’s a leafy disaster. For long banquet tables, stop trying to build one giant piece of decor and think in modules instead.
The secret to professional rehearsal dinner table decorations is the repeatable unit method. Most DIYers underestimate the volume needed for a lush look. Plan for roughly 15 stems per foot of table length so your runner looks intentional rather than like a sad, lonely vine.
Build your greenery in one-foot sections to lay end-to-end at the venue. This modular approach is a total lifesaver for transport and allows for quick adjustments if your venue shifts the table count. It’s basically Lego for floral design, just much prettier.
Since rehearsal dinners often involve shared family-style platters, keep your runner narrow. Aim for a six-inch width so servers can set down heavy plates without snagging a leaf. You don’t want a guest’s sleeve dragging through your centerpiece while they reach for the breadsticks.
Finish the look by tucking in LED votives every 12 to 18 inches. This creates a continuous ribbon of light that looks expensive but costs far less than a professional florist. You’ll be able to enjoy the toasts without worrying about a tangled mess of branches.
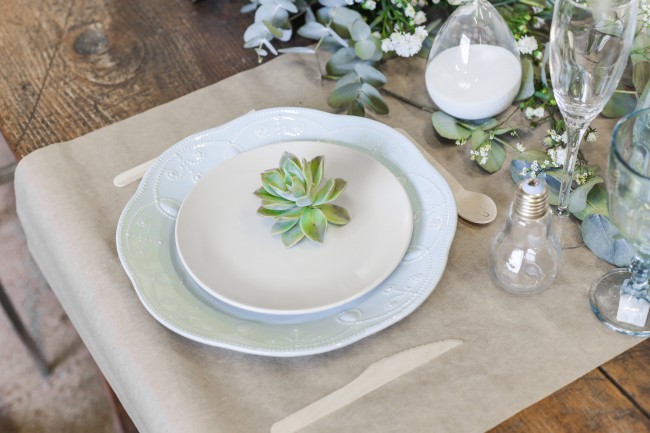
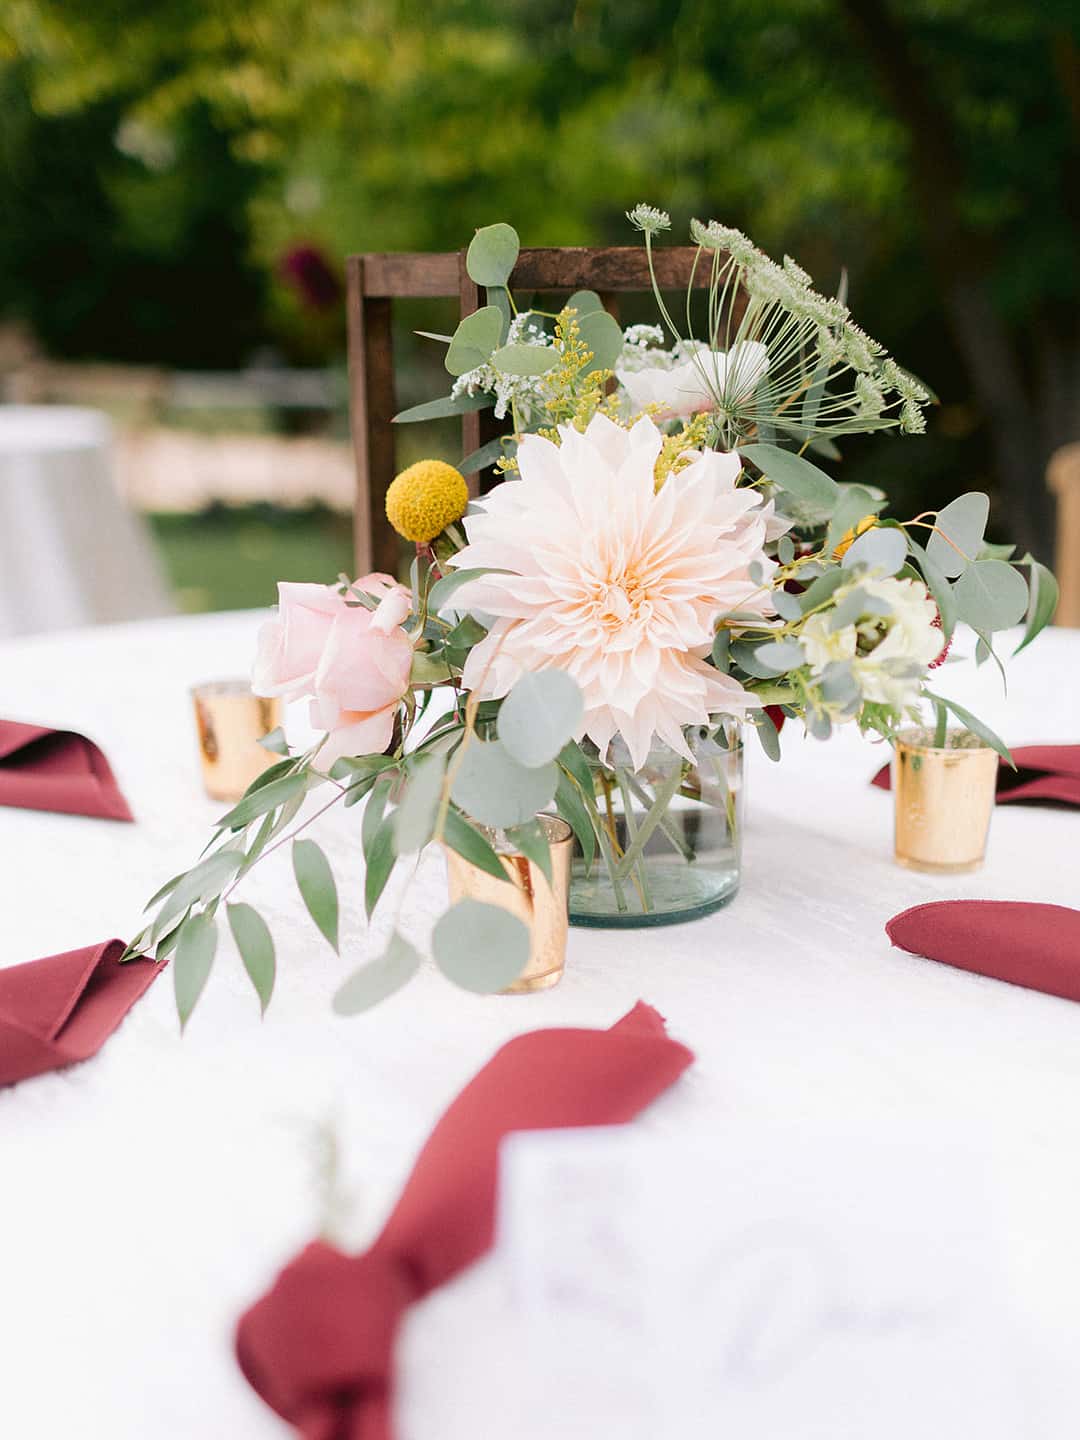
5. Master the “Low and Lush” Centerpiece Rule

Why pay for gorgeous florals only to have them act like a privacy fence? At a rehearsal dinner, you want to talk to your new in-laws, not play peek-a-boo through a forest of greenery.
The secret is keeping everything in the six to eight inch height sweet spot. This allows for perfect eye contact while leaving runway for the wine list and shared appetizers. For professional-looking rehearsal dinner table decorations, aim for a density of 15 to 20 stems per arrangement.
- Choose a Compote: Use a sturdy, low bowl rather than a top-heavy vase. These are much harder to knock over when the toasts get rowdy and arms start waving.
- Simplify the Recipe: Use only two or three flower varieties and repeat them often. This reads as high-end design rather than a random garden accident.
- Check the Footprint: Ensure your container choice doesn’t hog the space meant for bread baskets or wine bottles.
You want a centerpiece that anchors the table without starting a turf war with the calamari. Keep it low, keep it tight, and keep the Cabernet flowing.
6. Let Your Paper Goods Do the Heavy Lifting

Dread the thought of hauling crates of glass and glitter into a restaurant just to look “bridal”? It’s a logistical headache that usually ends with a trunk full of junk you’ll never use again. You can get full credit for your rehearsal dinner table decorations without buying a single vase by leaning on high-quality printables.
Focus on a core trio of paper goods to anchor each setting. This creates a “styled” look that fits in a single envelope.
- Place cards: These make guests feel expected and special.
- Simple menus: Even with a fixed menu, these add a professional touch.
- A “moment” card: Include a toast prompt, thank-you note, or welcome message.
Match your fonts to your wedding stationery for a high-end feel, or go intentionally casual with a playful script. You can display these as tented cards, clip them to the napkin, or lay them flat for a minimal look.
Pro tip: If the restaurant uses fixed seating, skip the massive seating chart. Use names-only place cards at each chair instead. Keep all design elements within the place setting’s footprint to ensure the table feels lush without cluttering the walkways between seats.
7. Upgrade Your Napkins to Signal You Have Your Life Together

Forget those stiff polyester squares that feel like cardboard. Swapping napkins is one of the easiest rehearsal dinner table decorations to pull off because it requires zero floral skill. Want to look like you’ve got it all figured out without a professional planner?
First, pick your lane:
- The Casual Knot: Perfect for a relaxed, bohemian vibe.
- The Tag Wrap: Use a simple name tag for a polished, intentional look.
- The Rectangle: A clean fold tucked under the salad plate for a minimal aesthetic.
Texture is everything. Linen-feel fabrics read as elevated and expensive, while shiny poly looks dated and stiff. Before you shop, ask the restaurant manager if you can replace their napkins or simply layer yours on top.
For a five-second upgrade, tuck in a tiny sprig of rosemary or olive for a fresh scent and a pop of green. To save your sanity, pre-fold everything at home. Transport them in a shallow plastic bin so they don’t wrinkle or shift during the drive.
8. Layer Your Place Settings for an Instant Upgrade
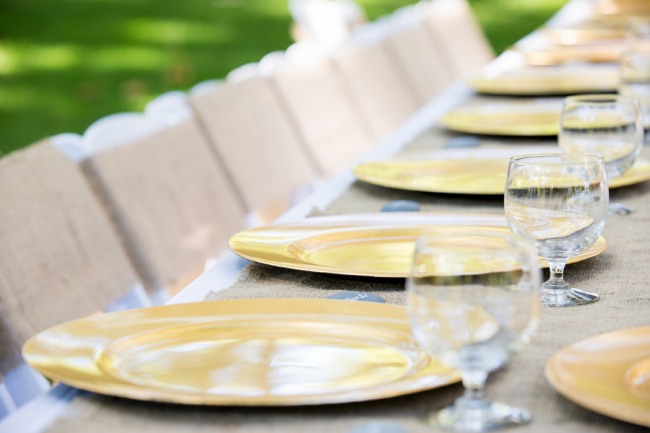
Ever sat at a “fancy” restaurant only to realize the plates look like your freshman dorm? It’s a vibe-killer when you’ve spent months dreaming of chic rehearsal dinner table decorations. The fix is simpler than you think. You just need to add a base layer.
A charger or placemat creates a defined territory for each guest. This makes plain ceramic feel intentional and upscale. It anchors the table so it doesn’t look like a standard dinner reservation.
Keep your palette tight with these three options:
- Metallic Chargers: Use gold, silver, or matte black for high-drama.
- Woven Placemats: Try rattan or linen for a modern, relaxed feel.
- Neutral Tones: Stick to sand, cream, or wood for a cohesive look.
Skip the high, chunky rims. If the base is too tall, your servers will struggle to clear plates safely. You don’t want a ceramic pile-up during the best man’s speech.
These are perfectly portable. Pack them up to reuse for the wedding-day brunch or the gift table tomorrow. It’s a high-return move that keeps on giving.
9. Make Favors Pull Double Duty as Place Cards
Do you really want to spend your wedding eve hunting for lost place cards or hauling boxes of leftover favors back to your hotel? Nobody has time for that. Make your favor do the heavy lifting by doubling as the seating guide.
This two-for-one strategy keeps your rehearsal dinner table decorations looking sharp and intentional. It also ensures guests actually take their gifts home instead of leaving them for the venue staff to toss.
Try these chic, table-appropriate options:
- Infused Oils: Miniature olive oil or balsamic bottles with a name tag tied around the neck.
- Custom Matchbooks: A classic, budget-friendly choice stacked neatly at each setting.
- Sweet Treats: Single macarons or artisanal chocolates in clear boxes with calligraphed stickers.
- Local Snacks: Small bags of gourmet popcorn or local coffee beans.
The key is to pick one hero item. Resist the urge to build an entire gift bag on the dinner table. You want a sophisticated accent, not a crowded retail display that blocks the view of your guests.
Attach a simple name tag to your chosen item and place it in the center of the plate. When the night ends, your guests walk out with their treats and you’re left with zero teardown. It’s efficient, stylish, and gives you one less box to haul.
10. Use Subtle Sentiment to Break the Ice

Want to share your “how we met” story without boring everyone to tears? Forget the hour-long slideshow. The best rehearsal dinner table decorations use photos as a quiet invitation to chat. You’re aiming for a vibe that says “thoughtful,” not “over-the-top scrapbook convention.”
Pick a Cohesive Theme
Stick to 1–3 small frames per table or one photo per place setting to spark easy conversation. If you’re stuck on which memories to share, try these hits:
- Then and Now: Showcase your “glow ups” side-by-side.
- Family History: Feature vintage wedding photos from both sets of parents.
- Childhood Pics: Place goofy shots near the respective family sides.
Keep the Design Consistent
To look like a pro, pick one frame style and stick to it. Whether you go with black, gold, or wood, consistency separates intentional decor from random clutter. Keep frames small so they don’t block the view of guests or compete with the dinner service. Who wants to play peek-a-boo with a centerpiece?
Repurpose for Tomorrow
Don’t toss these after the dessert course. Have a bridesmaid grab them so they can live on your wedding welcome table or in the lounge the next day. It’s a major win for your budget and your sanity. Why buy decor once when it can do double duty?
11. Turn Your Table Numbers into Social Wingmen
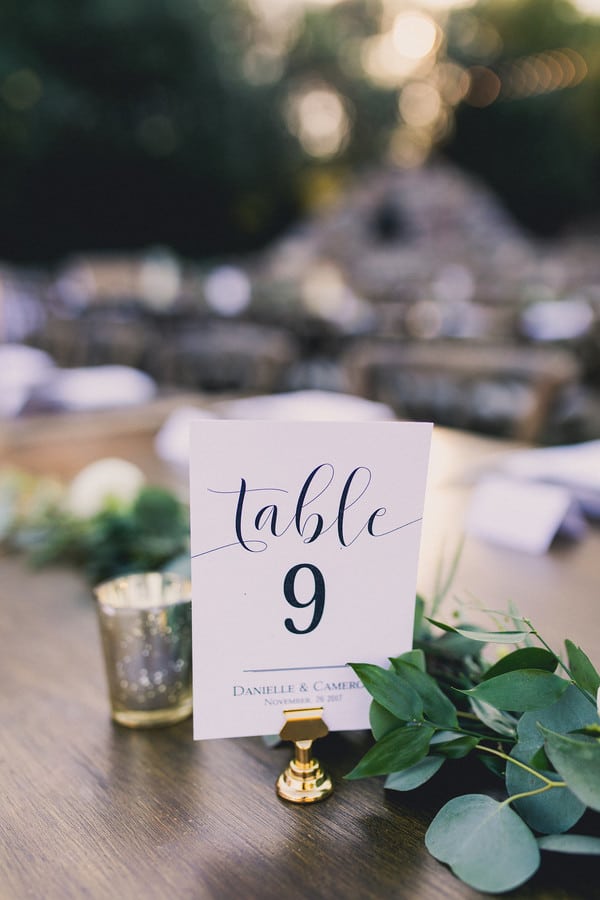
Why treat your seating chart like a math final? If you’re hosting a large group in a private room, you need a system to guide them. Just don’t let it feel like a wedding-day copycat. Use your rehearsal dinner table decorations for social heavy lifting instead.
Swap Numbers for Stories
Ditch the boring digits and label tables after your shared history. This breaks the ice before the first course arrives. Try these themes to get people talking:
- The First Date: An ideal spot for your mutual friends.
- Team Bride vs. Team Groom: A playful way to mix the families.
- Favorite Travel Spots: Use “Tokyo” or “Paris” to spark easy conversation.
Keep the Profile Low
Since these are functional tools, keep the size small. Choose low tent cards that sit discreetly beside the centerpiece. This ensures guests find their seats without blocking their view of the person sitting directly across the table.
Want to kickstart the mingling? Print a prompt on the back like, “Ask someone at the ‘First Date’ table for their favorite story about the groom.” If you’re using one long table, skip the numbering and stick to personalized name cards only.
12. Don’t Wing the Setup: Logistics and Your Secret Toolkit

Think you can show up with a box of candles and twenty minutes to spare? That’s a one-way ticket to a sweat-induced meltdown while your future mother-in-law watches from the bar. While the decor looks pretty in your head, the logistics are what actually make your rehearsal dinner table decorations happen without a hitch.
Before you buy a single tea light, figure out your setup situation. The questions are slightly different depending on where you’re hosting:
Restaurant or private room:
- Are open flames allowed on the dining tables?
- What is the earliest we can access the space for setup?
- Who sets items like menus or favors: us or your staff? (And is there a fee?)
Backyard or home:
- Do you have outdoor-rated extension cords and enough outlets for LED strands or string lights?
- What’s the weather backup plan for paper goods and open flames?
- Are surfaces level enough for bud vases and candles, or do you need floral putty?
Rental venue or event space:
- What time can you access the space for setup and teardown?
- Can you store decor on-site earlier in the day?
- Does the rental include tables and linens, or are those separate?
Pack a “no-panic” toolkit to keep in your car. You’ll definitely need:
- Scissors and surface-safe tape, like painter’s tape.
- Extra batteries for LEDs.
- A lighter (if flames are allowed).
- A microfiber cloth for smudgy glassware.
- A Sharpie for last-minute place card fixes.
When you arrive, follow this flow: runners first, then centerpieces, followed by paper goods. Save the candles for the very last step. This order prevents you from knocking over a bud vase while trying to shimmy a runner underneath it.
Aim for a 60 to 90 minute setup window. A four-hour decorating party is a fantasy that only leaves you exhausted before the first toast. Keeping the window tight forces quick decisions and prevents the “over-tweaking” that leads to pre-dinner stress.
13. Stop the “Overkill” Anxiety: How to Prioritize Your Spend
Staring at your Pinterest board and realizing you’ve accidentally planned a second wedding? Take a breath. Your rehearsal dinner table decorations should feel hosted, not like a six-figure stage production. The goal is a vibe that says “I have great taste” rather than “I haven’t slept in three days.”
Stop the overkill by spending where it actually shows. Focus on warm lighting and exactly one consistent anchor element. Choose between a textured runner, simple bud vases, or custom placemats. You don’t need all three to make the Merlot taste better or the family stories less awkward.
- DIY Sweet Spots: Stick to LED candles, paper goods, and simple greenery bundles. These are low-risk items that won’t cause a 2 a.m. floral glue meltdown.
- Pay-for-it Moments: If your timeline is tighter than your Spanx, outsource the labor. Order pre-made low arrangements or pay the restaurant a small fee to handle the candle setup.
- The Rental Caution: Rental fees look cheap until you’re stuck returning 50 chairs to a warehouse the morning of your wedding. If it doesn’t fit in a standard car trunk, skip it.
Is that extra garland really worth a frantic 7 a.m. errand? Prioritize your sanity, keep the decor focused, and save your energy for the actual big day.
14. Master the Next-Day Pivot: Your 12-Hour Decor Strategy
Why buy gorgeous decor for a three-hour dinner only to toss it at midnight? That is a tragic waste of your budget and your effort. Think of your rehearsal dinner table decorations as a “soft launch” for your wedding day aesthetic. If you buy it once, you should use it twice.
What Repurposes Best?
Some items are logistical nightmares while others are born to be moved. Stick to the survivors that travel well and won’t look sad by morning.
- The Winners: LED votives, bud vases, frames, and table-top signage.
- Suite Treats: Move extra napkins and leftover snacks to the getting-ready suite for wedding morning fuel.
- The Rejects: Skip messy greenery garlands, anything that wilts without water, or rentals with strict return windows.
The Handoff System
Don’t rely on your post-wine memory to get things to the right place. Trust us, your brain will be elsewhere by dessert. Label plastic bins by their destination for tomorrow: “Welcome Table,” “Cards,” or “Lounge.” This lets your “Sweep Team” help without asking you a dozen questions.
The 12-Hour Gap Hack
Assign two reliable friends and one spacious vehicle to your transport team. Instead of hauling heavy boxes at 1 a.m., do a ten-minute collection right after dessert. While guests are still mingling, your team can pack the non-essentials. You will be tucked into bed while the rest of the world is wrestling with bubble wrap in a dark parking lot.
Frequently Asked Questions About Rehearsal Dinner Decor
Do I need to decorate the rehearsal dinner tables at all?
Honestly, you can totally skip the elaborate decor if the restaurant already has a vibe you love. It is perfectly normal to do little to nothing for this event. Many couples let the venue’s existing aesthetic do the heavy lifting. If you feel like the space needs a little something extra, focus on two things: lighting and names. A few flickering votives and some chic place cards are enough to make the dinner feel special and hosted. Keep it simple so the evening does not start feeling like a mini wedding. Pick one hero element and call it a day.
Are real candles allowed in restaurants or tents?
Restaurants and tent venues are often very picky about open flames due to local fire codes. Some might allow them if they are contained in glass, while others require special permits. To avoid a stressful mid-dinner lecture from a manager, always ask your venue contact for their policy in writing. The default safe choice is warm white LED votives. They provide that romantic glow without the risk of a fire drill or a melted tablecloth. If you use LEDs, look for frosted shells to make them look more like the real thing.
How many votive candles do I need per table?
For an eight foot banquet table, aim for five to seven votives for a minimal, clean look. If you want a heavy, romantic glow that looks amazing in photos, go with eight to twelve. For a 60 inch round table, six to eight candles usually feels balanced. You can adjust these numbers based on whether you are also using florals. If your centerpieces are large, you might need fewer candles to avoid a cluttered look. Just make sure they are spaced out enough so guests can still pass the bread.
How many flower stems should I buy for a DIY setup?
If you are filling bud vases, plan for three to five stems per vase. For a standard low centerpiece, you will need about 15 to 20 stems to make the arrangement look full and professional. Always buy a 10 to 20 percent buffer for your total stem count. Flowers are delicate, and you will inevitably run into a few broken heads or stems that just look a bit sad. Having a backup stash ensures every arrangement on your table looks lush and intentional rather than sparse.
What is the fastest restaurant setup plan?
Efficiency is your best friend when you only have a small window to decorate. Follow this specific order: lay your runners first, then place your centerpieces. Follow those with your paper goods like menus and place cards, and save the candles for the very last step. This prevents you from knocking over a vase while trying to shimmy a runner into place. To make the process even smoother, pack your supplies by table and label every bin clearly. Assign a teardown buddy ahead of time so you can focus on the toasts.
Don’t forget to pin this to your 00Uncategorized Board for later!