When handling or storing a longer veil such as chapel or cathedral length, it can be easy to just throw it over the back of a chair as opposed to properly storing it. I suppose there is so much happening on a wedding day morning that caring for your veil becomes an afterthought.
*sigh* I can’t be the savior of each and every bridal veil.
However, I do think you should care for your cathedral length veil to ensure that it is in tip-top shape when you walk down the aisle.
A bridal veil has to be one of the most iconic bridal accessories. It is important to make sure that from the moment you buy it, you avoid any unfortunate stains, rips, or stubborn creases that could dampen that special moment.
Let’s take a look at a few tips for how to properly care for your cathedral length veil, and make sure you have all the appropriate tools.
What to Do After Buying A Veil
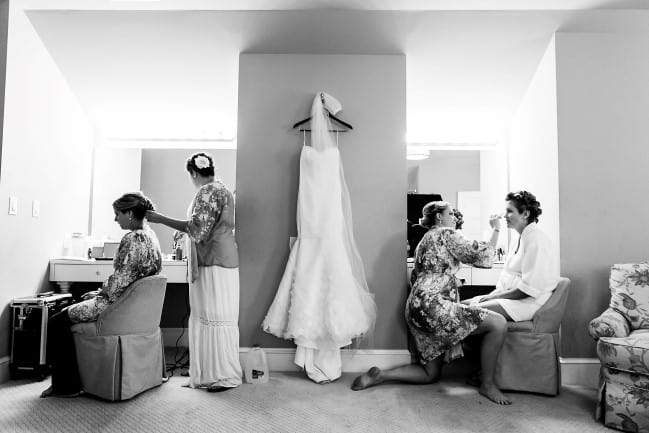
Once you have bought your bridal veil be sure to hang it up properly. For longer chapel and cathedral veil lengths – more than 90″ or so – there can be a lot of material to tame. Your best bet with a long veil is to fold it. Then, place the folded veil over a sturdy hanger.
7 Steps to Properly Store your Lengthy Veil
- Lay the veil on a smooth flat surface. Smooth out wrinkles.
- Fold the veil width wise in half and again smooth out wrinkles.
- Fold until the veil is about 12″ – 15″ wide, smoothing out the wrinkles as you go.
- Using a hanger, carefully slide the veil onto the hanger from the top.
- When the hanger reaches mid-point of the veil, pull the hanger up so the veil hangs nicely.

- To protect your veil from dust and other potentially harmful foreign matter, it is a smart idea to keep it within a breathable garment bag.
- Once you have properly hung up your veil and placed it in a bridal garment bag, hang in an uncrowded closet at room temperature.

A Week Before Your Wedding
A few days to a week before your big day, it is time to take your veil out of the closet or garment bag in order to get it ready for the big day.


Unfold the long veil and clip the comb with a bridal veil storage clip. Hang the veil from a high rod or door and allow the entire veil to extend without any folds; let any small wrinkles release naturally.
I great option is to get yourself one of these inexpensive Bridal Veil Storage Clips!

Attaching the clip to different lengths
Standard Veil: Attach the clip to the comb and allow your veil to hang straight down.

Drop Veil: For a drop veil or mantilla veil that has no gathering at the comb, clip onto the top of the comb with the teeth of the comb pointing down. This allows the tulle to hang in the same direction as it will be worn, and reduces stress on the stitching.

Get Rid of Wrinkles
Wrinkles aren’t just the bane of aging women everywhere, they are also a problem for wedding veils! Allow additional time for your veil to hang so that wrinkles will naturally disappear.
Sometimes those hard to remove wrinkles are so deep that even employing the steam from the shower trick just wont work. A good seamstress will be able to steam the wrinkles out of your veil for you. Another option is to take your veil to a local professional dry cleaner for steaming. Also a safe way to clean your garments after the wedding.

DIY Steaming
I see nothing wrong with deciding that you would like to steam/iron a veil on your own. Do be aware that steaming a cathedral length veil is going to take a good chunk of precious wedding planning time.
Steps to Using a Steamer:
- Fill the steamer with the recommended water level, then turn the steamer on. Wait until the steamer is fully heated. You should see a steady flow of steam before using it.
- Hold the wand of the steamer. From the top of the veil – about 6 to 8 inches away from the material – work your way downwards in circular motions to work out wrinkles. You will see the creases slowly begin to vanish and the material become flawless.
- Once finished, hang the veil up with a clip. Let the veil cool down completely before shaking or moving the veil too much.
A Few Pointers to Consider:
- Be careful around any embellishments. Crystals, rhinestones, or other attachments that are glued on may come loose.
- Although an iron can be used on a veil, you risk melting the delicate tulle material. For that reason I don’t recommend it. Consider this your warning!
If you insist on ironing your veil, I did find this video about ‘how to get wrinkles out of a wedding veil’ helpful.
https://www.youtube.com/watch?v=D8SuPeMzNw4
After your Wedding Day
Your lengthy veil performed beautifully and looked absolutely stunning! Congrats on buying a veil, caring for it, preparing for the big day, and properly wearing the veil without any mishaps.
Now what do you do with it?
Lets leave that for next week in an article on how to preserve your wedding veil.
Save
Don’t forget to pin this to your Wedding Fashion Board for later!